

Welcome to our remote-learning course: how to rebuild your split screen van’s cable loom. Does your cable loom looks cracked and corroded? If yes, this it the right course for you!
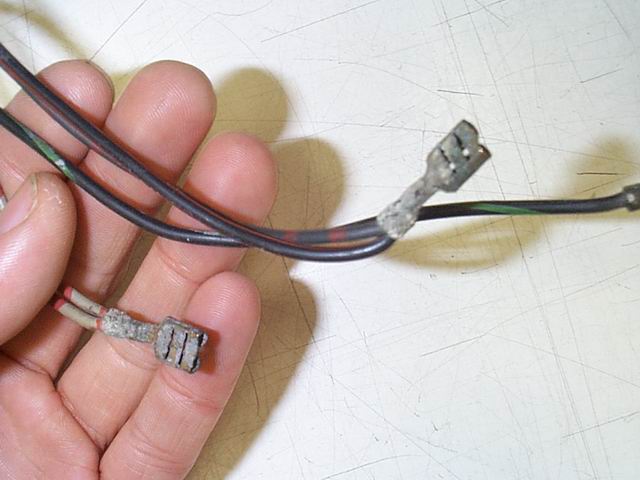
The first step in rebuilding your cable loom is to remove the corroded contacts and old tubing. A time consuming job, since you would not want to damage the wires inside the old tubing. Now, why would we want to keep the old wires? The answer is simple: the original wires are colour coded that correspond with the colour coding on the original wiring diagram. Using the original colour coding saves a lot of time when installing the wiring and prevents you from using labels for every contact.
Before we put the original wires back into new tubing, we checked all wires for damage and performed electrical tests on all the wires to make sure they do not require replacement. Bend the wires while testing to check that there is no internal damage of the wires. We taped the wires to each other and attached them to a clothesline, which we used to guide the wires through the new tubing. Some silicon spray helps slide the wires a lot easier through the new tubing.
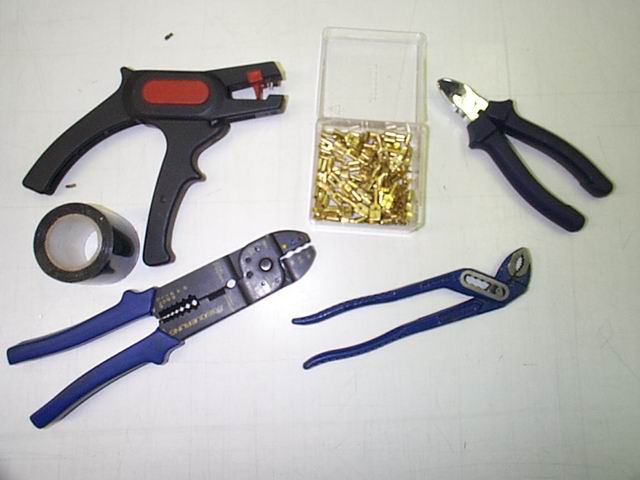
After all the wires have been packed in new tubing, you can install the new contacts. I chose to use solder contacts instead of the well-known blue and red clamp on contacts. The main reason for me was to keep the original look, additional advantage is that they are much more reliable since they are soldered to the wires instead of clamped. Alternatively you can buy a complete new cable loom; prepare to spend at least Euro 300.
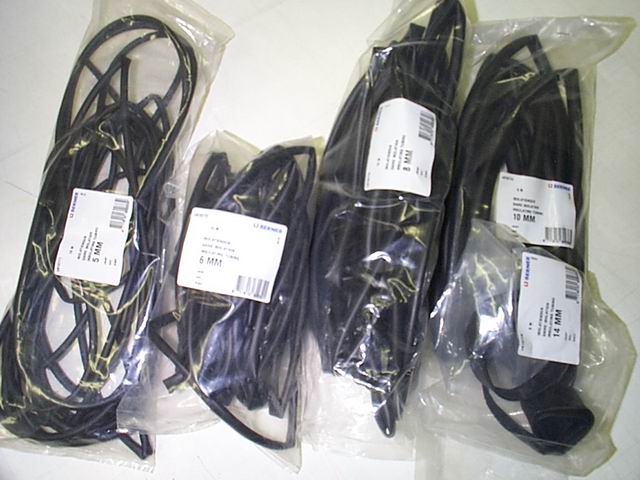
A complete DIY set will cost you about Euro 15. The new tubing comes from Berner, solder contacts can be bought at various places and will usually come in a 100 pack. You will also need a pair of wire strippers, insulation tape, a soldering iron and a small pipe wrench.
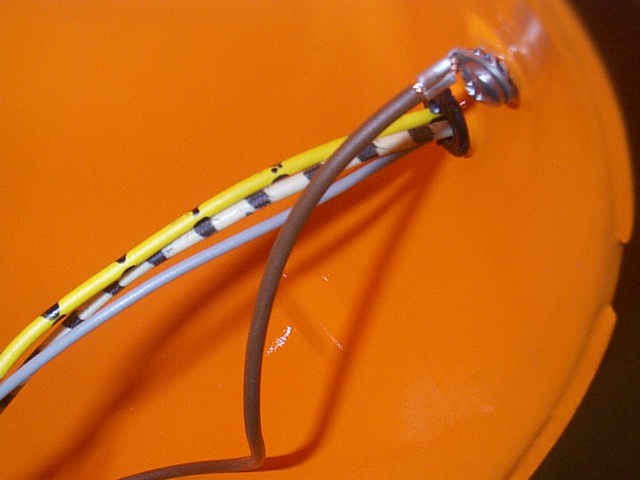
When installing the cable loom in your van, use a clothesline to guide the cable loom through the chassis. Use grommets at the places where the wiring goes through the body (for instance at the headlights). A locking ring between the ground connection and body will ensure good contact and will safe you from a lot of electrical problems.